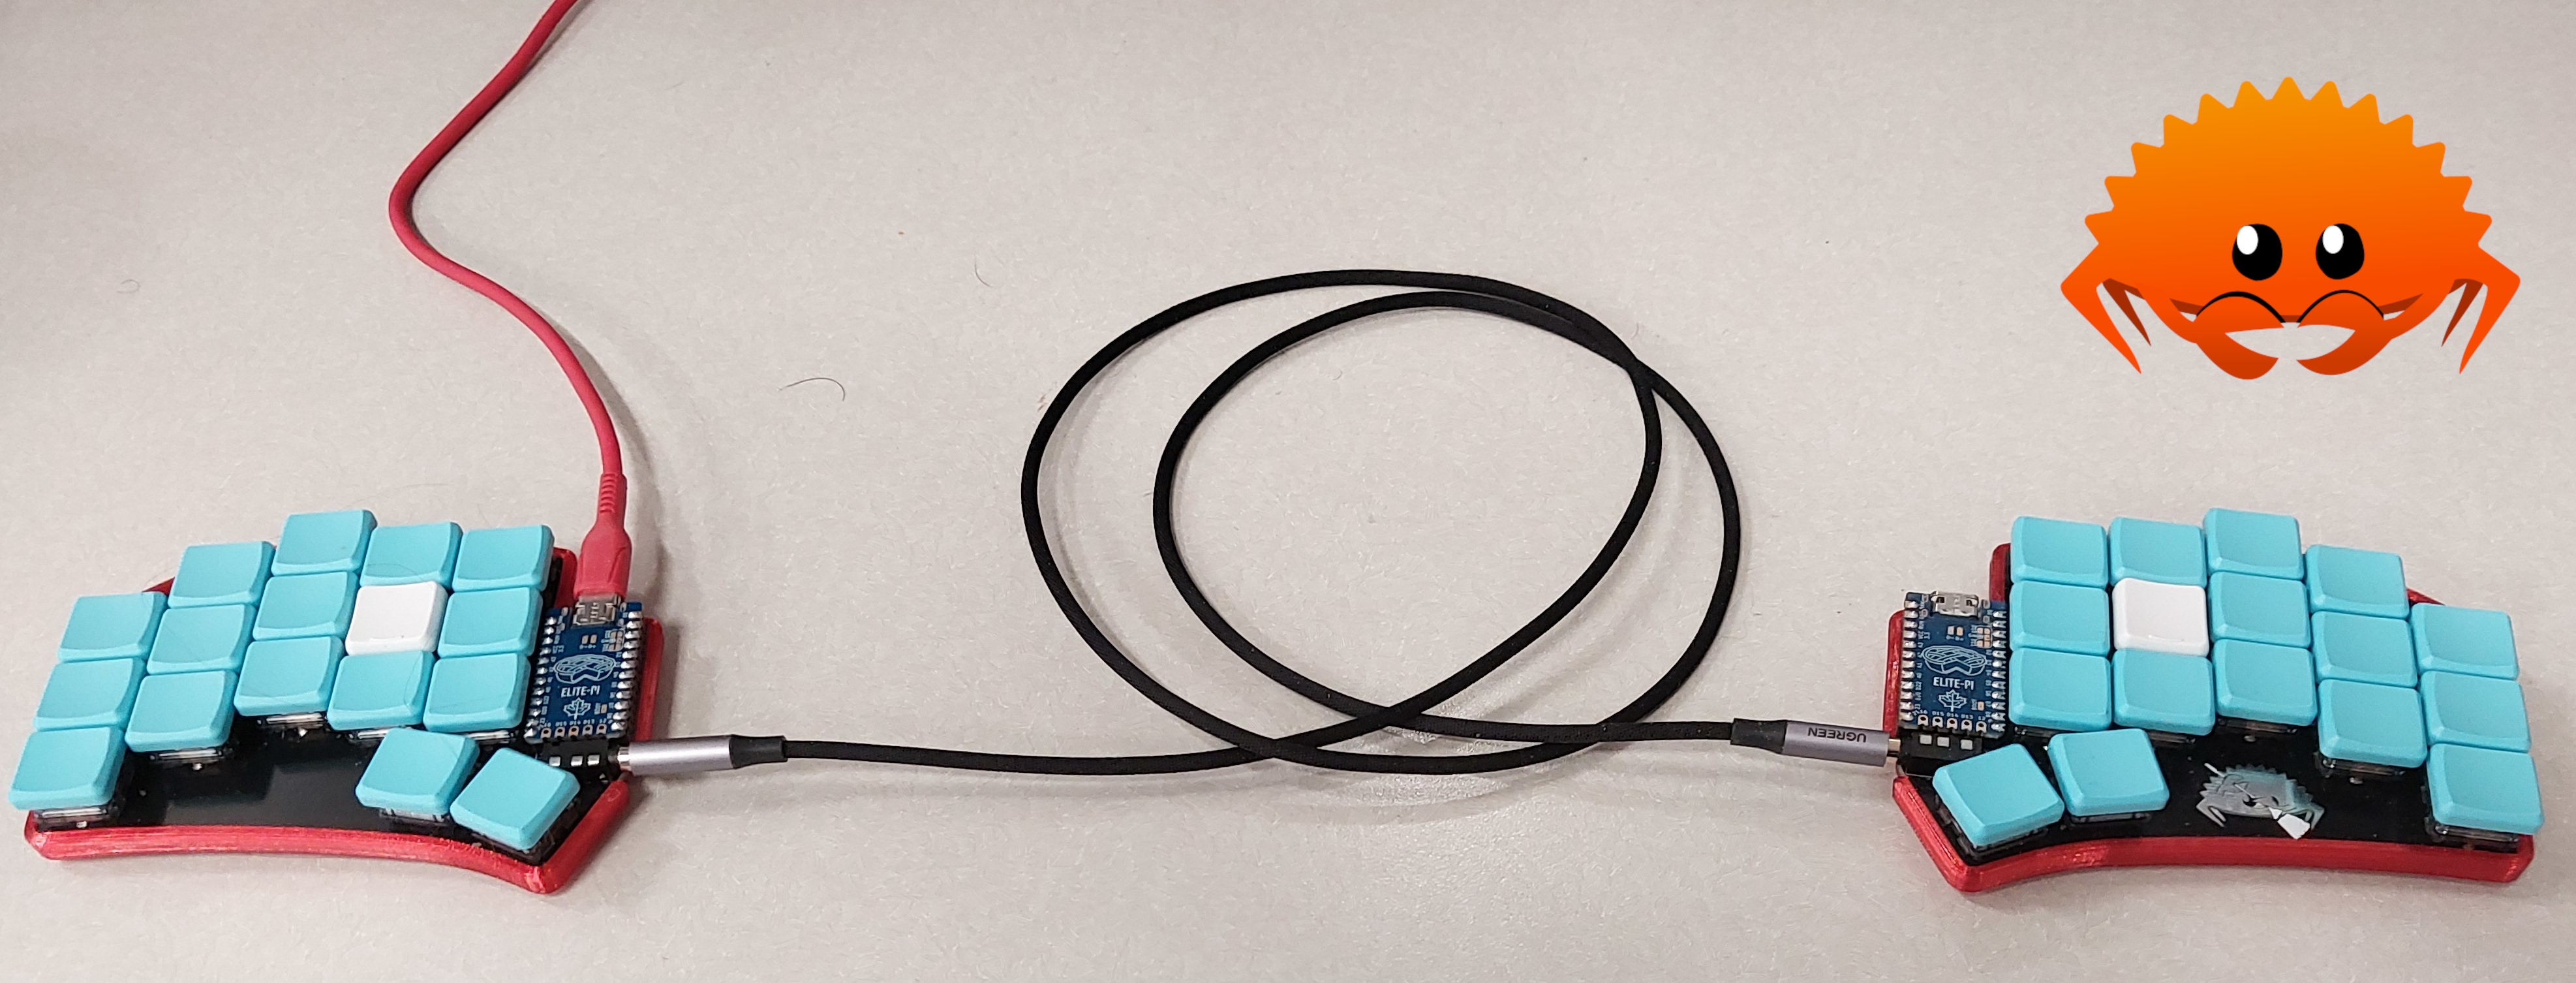
The other day, I stumbled upon RMK, a keyboard firmware written in Rust. Given that my Ferris Sweep has a Ferris the crab logo on the silkscreen, it felt only fitting that I flash it with RMK.
Since I first built it, my Ferris Sweep has been running QMK, a very mature C-based keyboard firmware. QMK is a great project, and doing basic keymaps for an already-supported keyboard is straightforward and well-documented. However if you are designing your own keyboard, or want to use certain advanced QMK features, you wont be able to use QMKs JSON-based ‘data driven’ features. Instead, you will have to use its C macro based configuration, which can be daunting and may require understanding QMKs complex build system.
RMK is a much newer project than QMK. QMK provides premade configurations for over 1,000 keyboards, allowing you to build someone else’s design and get straight to designing a keymap, without having to fuss about with matrices or pin mappings. RMK has no such definitions, just documentation of how to write them and a few example projects, which made the journey to put it on my Ferris Sweep interesting enough to write about.
Configuring the firmware
Now, the setup between RMK and QMK is a bit different.
In QMK, you clone the entire QMK repo, make any keymap modifications you want,
and compile.
RMK, being written in a language with a decent package manager,
just has you make a repo from a small template that depends on the RMK crate.
RMK provides a tool, rmkit, to help you setup this repo.
I started by installing rmkit and a few embedded tools via cargo, running:
cargo install rmkit flip-link elf2uf2-rs probe-rs-tools cargo-make cargo-binutils llvm-tools
Then I ran rmkit init and answered a few questions about my keyboard,
which generated my initial template.
From there, I modified .cargo/config.toml to use elf2uf2-rs,
as my keyboard does not have an exposed debug header, which would be needed for probe-rs.
The docs mentioned I may have to modify a file called memory.x,
which defines the microcontrollers memory map,
but I found the template already had the correct memory map for the RP2040.
keyboard.toml
That was the easy part done.
The next step was to configure a file called keyboard.toml.
This file is used by RMK to configure everything from the type of microcontroller we use,
to defining which pins on the microcontroller correspond to which keys,
and even configuring the initial keymap,
all at compile time.
Similar to QMK, RMK does provide you with the option to configure your keyboard using Rust code directly,
but I wasn’t doing anything fancy enough to justify that.
The first part of the keyboard.toml contains some basic metadata about your keyboard,
like its name, USB ID, and what microcontroller it uses.
I lifted all this info from QMK’s Ferris Sweep info.json for the sake of consistency.
Then I had to configure the pin mappings, defining which pin correspond to each key (in the Ferris Sweeps case, as it is a direct wire, where each pin corresponds to exactly 1 key),
or defining which pins correspond to rows and columns of the keyboard matrix (in the case of most larger keyboards.)
This proved more difficult than expected,
as I planned to take the pin mappings from QMKs pin mapping configuration file,
the keyboard.json.
However, it was unusable, as the keyboard.json gives pin mappings for a different microcontroller,
the ATmega32U4, specifically for the Arduino Pro-Micro board.
QMK does some black magic at compile time in order to rewrite these pin mappings to their RP2040 equivalents,
but I was not able to figure out said magic in order to do the same by hand.
In the end, I cloned the repo for the Ferris Sweep itself and looked at the PCB design in Kicad,
tracing where each pin went and cross referencing with the elite-pi (my specific RP2040 board) usage guide to get the pin number.
Another thing I had to do was define how the 2 microcontrollers in each half of the keyboard communicate with each other,
and define the pins that are used in that communication.
Due to being a ‘direct wire’ design,
the Ferris Sweep only has one IO pin on each micro that’s not dedicated to a key.
This means it has to use whats called ‘half-duplex’ UART,
where a single wire is used for 2 way communication.
Luckily, RMK supports this mode of communication through the RP2040’s PIO feature.
Unfortunately, this ability to use half-duplex over PIO is only on RMK’s master branch,
and has not made it into a stable release as of this writing (incorporated in 0.6.0).
This simply means I had to do some fiddling in the Cargo.toml file to instruct cargo to fetch the latest commit from git, rather than getting the latest published version of the package (this has since been incorporated in the 0.6.0 release).
After the painful process of tracing each pin and defining the pin mappings, we can define the keymap. My keymap is not especially fancy, other than its extensive use of layers and tap-hold Keybinds. (keybinds that do a different thing on being held down than they do on tapping them) All the features I use are well documented by RMK, so while porting the keymap was tedious, it was not especially difficult or noteworthy.
vial.json
The next and most complicated step, was creating a vial.json.
This file is used by the VIAL software to allow you to remap your keyboard without re-flashing the microcontrollers,
and for ‘reasons’, the keyboard will fail to boot if your vial.json does not match your keymap.
The JSON file provided by the via project was wrong,
as it laid out the keyboard as a 8x5, rather than a 4x10 that I had done in RMK.
So I had to take that file, load it into the keyboard layout editor,
and follow vials guide to remake the vial.json in the right layout.
Ill be honest, I still don’t fully understand what I was doing, I just messed around until it worked.
Flashing and debugging
Finally, I could flash my keyboard. I flashed it, and… It didn’t work. The left hand side, the one plugged into USB, worked fine, all keys worked. But the right hand side, connected to the main by TRRS, did nothing. A day or 2 of investigation later revealed that the half-duplex serial implementation only used the RP2040’s internal pull-up resistors, which for my keyboard and TRRS cable were insufficient for a baud rate of 115200. This was (temporarily) fixed by setting a lower baud rate in the RMK source code, but for the long term, I’ve made a PR mirroring QMKs solution to this problem (has been merged and released in 0.6.0).
But, after all that, I had a Ferris Sweep running Rust, just as the silkscreen demands. Granted, until the PR gets merged and a new release is cut, its running a modified version of RMK from my own fork(since the 0.6.0 release, I’m running stock), but it’s still Rust.
The final firmware repo is here, if you want to use it for your own RP2040, wired Ferris Sweep, or just want an example to help you along.
Using RMK.
I then proceeded to use RMK for a few tasks, including writing this article. It did not feel the exact same as QMK, I think some of the timings on tap-hold and key debouncing might be different, but, apart from a few repeated keys (which should be fixed once configurable debouncing lands) (has been merged, but is currently master only.), it was a very serviceable keyboard firmware. Obviously, being a much newer project than QMK, it has not yet implemented some of the more advanced features QMK has, such as support for displays, per-key RGB, or pointing devices. The next release is focusing on input devices, so in the future RMK will also support keyboards with encoders and pointing devices like trackballs and touchpads.
Final thoughts
Due to the difficulty I had in setting up RMK,
I would not recommend it to anyone who is not already familiar with configuring another keyboard firmware,
and you should have at least some knowledge of microcontrollers, such as how to figure out your keyboards pinout.
However, if you are interested and have some prior experience, it has some really cool ideas,
such as the use of an async runtime in a microcontroller (thanks to embassy),
and compile time parsing of its keyboard.toml file with a proc-macro to generate code for the firmware without forcing the user to write Rust.
It is also a great example of a complex Rust codebase using Embassy.
As for myself, I plan on continuing to use RMK for my Ferris Sweep, and will probably use it for any other keyboard I build that it supports. I also plan on continuing to contribute to the project, fixing issues as I find them.